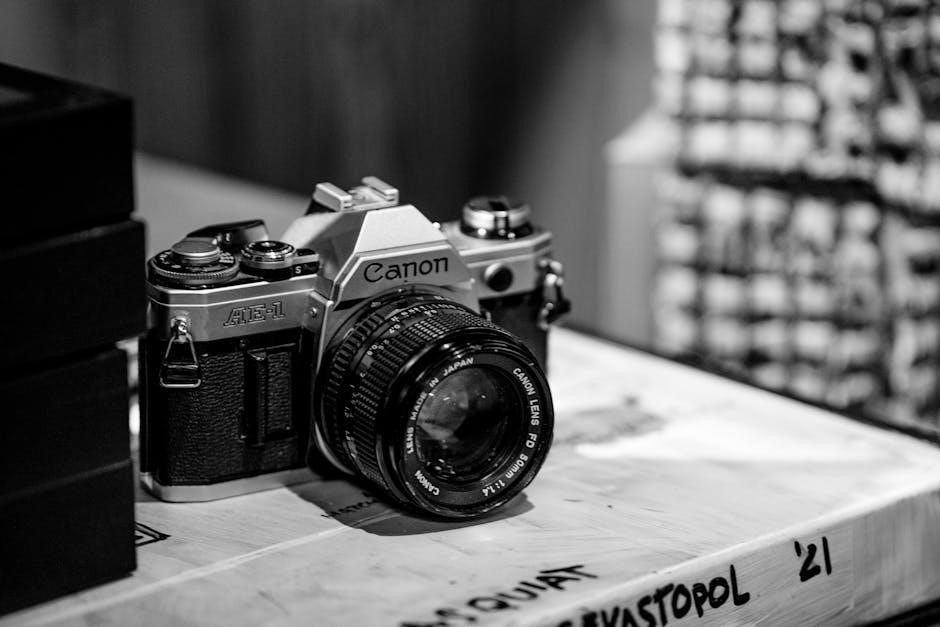
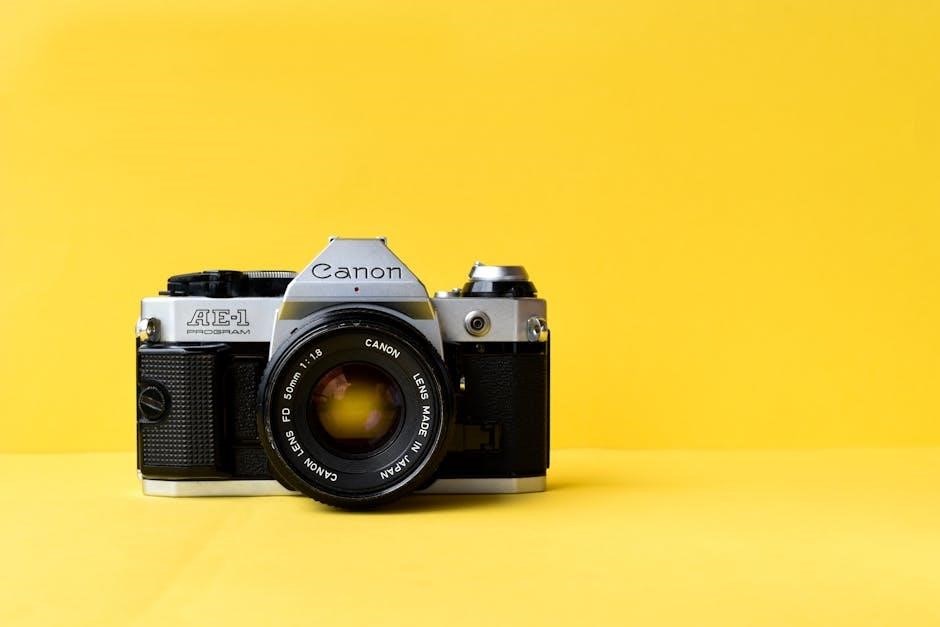
The Canon AE-1 Program is a revolutionary 35mm SLR film camera introduced in 1981, celebrated for its ease of use, versatility, and compatibility with Canon FD lenses․
Overview of the Canon AE-1 Program
The Canon AE-1 Program is a legendary 35mm SLR camera introduced in 1981, designed for both professionals and enthusiasts․ Known for its intuitive design, it combines automatic and manual controls, offering versatility in various shooting conditions․ The camera features a built-in metering system, multiple exposure modes, and compatibility with Canon FD lenses․ Its durability and ease of use made it a favorite among photographers, solidifying its place in the history of film photography․
Significance of the Canon AE-1 Program in Film Photography
The Canon AE-1 Program holds a revered status in film photography, celebrated for its blend of innovation and accessibility․ Released in 1981, it democratized advanced features like program modes, making professional-grade photography attainable for enthusiasts․ Its influence extended to photography education, becoming a staple in classrooms worldwide․ Today, it remains a collector’s favorite and a testament to the golden era of film cameras, embodying the perfect balance between functionality and artistic expression․

Canon AE-1 Program Camera Specifications
The Canon AE-1 Program is a 35mm SLR camera with an electronic shutter, FD lens mount, and ISO range of 12-3200․ It features manual and program modes, a horizontally traveling focal-plane shutter, and a 95% viewfinder coverage․ Built with durability, it uses a 6V silver oxide battery and weighs 470g without the lens․ Its design and functionality make it a versatile tool for both casual and professional use․
Camera Type and Operation Modes
The Canon AE-1 Program is a 35mm film SLR camera offering Program, Aperture Priority, Shutter-Speed Priority, and Manual modes․ Its SLR design provides precise composition through the viewfinder․ Program mode automates exposure, while Aperture Priority allows control over depth of field, and Shutter-Speed Priority enables motion effects․ Manual mode offers full creative control․ The camera features a durable build, intuitive controls, and compatibility with FD-mount lenses, making it versatile for photographers of all levels․
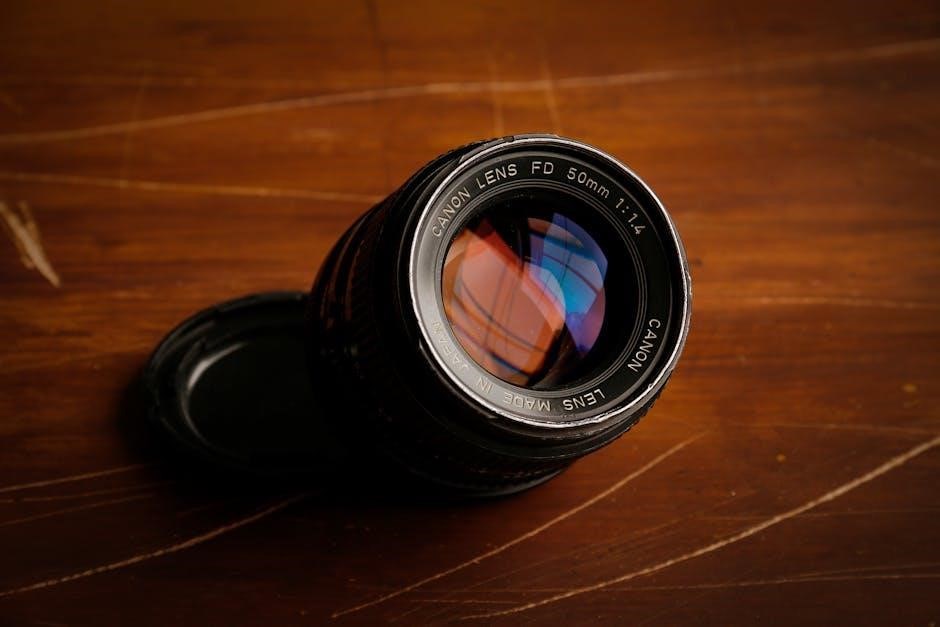
Compatibility with Canon FD Lenses
The Canon AE-1 Program is designed to work seamlessly with Canon FD-mount lenses․ This compatibility ensures access to a wide range of high-quality lenses, from wide-angle to telephoto, offering versatility for various photography needs․ The FD lens system provides precise control over focus and aperture, enhancing the camera’s functionality․ While newer Canon EF lenses are incompatible without adapters, the FD system remains a robust choice for photographers using the AE-1 Program․
Understanding Exposure Modes
The Canon AE-1 Program offers four exposure modes: Program, Aperture Priority, Shutter-Speed Priority, and Manual․ These modes provide flexibility and control for photographers․
Program Mode (Automatic Shutter Speed and Aperture)
In Program Mode, the Canon AE-1 Program automatically sets both shutter speed and aperture for optimal exposure․ This mode is ideal for beginners or quick shooting situations, as it simplifies camera operation․ The camera’s microprocessor calculates the best exposure settings based on the scene, ensuring well-balanced results․ While it offers minimal manual control, users can still adjust settings like film speed or use exposure compensation for fine-tuning․ This mode is versatile and efficient for everyday photography․
Shutter-Speed Priority Mode
In Shutter-Speed Priority Mode, you set the desired shutter speed, and the camera automatically adjusts the aperture for proper exposure․ This mode is ideal for controlling motion effects, such as freezing fast-moving subjects or creating blurred effects․ The AE-1 Program’s metering system ensures accurate aperture settings based on the selected shutter speed, making it suitable for sports, action, or low-light photography where motion control is critical․ This mode offers creative flexibility while maintaining reliable results․
Aperture Priority Mode
In Aperture Priority Mode, you manually set the aperture, and the camera automatically adjusts the shutter speed for optimal exposure․ This mode is perfect for controlling depth of field, allowing you to isolate subjects or ensure sharpness across the frame․ Simply rotate the aperture ring to your desired f-stop, and the AE-1 Program will handle the rest․ This mode is ideal for portrait, landscape, or creative photography where depth of field is critical․
Manual Mode
In Manual Mode, you have full control over both aperture and shutter speed․ This mode is ideal for experienced photographers who want precise control over exposure settings․ By adjusting the aperture ring and shutter speed dial, you can achieve the exact exposure you desire․ The camera’s built-in meter provides guidance, but you must set the values manually․ Manual Mode offers ultimate creativity and precision for unique lighting conditions or artistic effects, requiring a good understanding of exposure principles․
Loading Film and Film Speed Settings
Loading film involves opening the camera back, aligning the film with the spool, and advancing the film to the first frame․ Always ensure the film is properly seated and the back is closed securely to avoid exposure․ Film speed settings are crucial for accurate exposure, so enter the ISO value using the dial to match your film type for optimal results․
Step-by-Step Guide to Loading Film
Open the camera back by pulling the release latch․ Align the film with the spool, ensuring the perforations match the take-up spool’s teeth․ Gently advance the film to the first frame using the rewind knob․ Close the back securely to protect the film from light․ Check the frame counter to confirm it starts at “0․” Always load film in shade or use a lens cap to prevent accidental exposure․ Proper alignment ensures smooth operation and accurate frame spacing․
Setting the Film Speed (ISO)
Locate the ISO dial on the top right of the camera․ Lift and turn the dial to match your film’s ISO rating, found on the packaging․ Ensure the dial clicks into place for accurate exposure․ The AE-1 supports ISO ranges from 12 to 3200․ Always verify the film’s ISO before shooting to achieve optimal results․ Proper ISO setting is crucial for correct exposure and image quality․
Focusing Techniques
The Canon AE-1 Program features manual focusing via the lens’s focusing ring and viewfinder’s split-image microprism, ensuring precise focus control for sharp, well-defined images every time․
Manual Focusing with the AE-1 Program
Manual focusing on the Canon AE-1 Program is achieved using the lens’s focusing ring and the viewfinder’s split-image microprism for precise alignment․ The microprism ring in the viewfinder assists in achieving sharp focus, especially in low-light conditions․ By rotating the focusing ring, users can manually adjust the focus, ensuring optimal clarity․ The smooth operation of the focusing mechanism allows for seamless adjustments, making it ideal for photographers who prefer manual control over their composition and depth of field․
Using the Viewfinder for Accurate Focus
The Canon AE-1 Program’s viewfinder features a split-image microprism ring and a ground glass screen for precise focusing․ Align the split images or use the microprism’s sparkle to ensure sharp focus․ The viewfinder also displays shutter speed and aperture settings, allowing for quick adjustments․ Its 0․85x magnification and 95% coverage provide an accurate preview of your composition, aiding in manual focusing and overall exposure control for professional-grade results․
Metering and Exposure Control
The Canon AE-1 Program features a built-in center-weighted meter for accurate light reading․ It measures ambient light to determine optimal exposure settings, ensuring balanced results․ The camera also allows manual override for creative control, enabling photographers to adjust settings based on specific lighting conditions or artistic preferences, providing flexibility and precision in capturing images․
Center-Weighted Metering System
The Canon AE-1 Program employs a center-weighted metering system, which measures light primarily from the central area of the frame․ This system prioritizes the subject in the middle, making it ideal for portraits and straightforward compositions․ It provides consistent and accurate exposures by averaging the light from the center, while still accounting for peripheral areas to some extent․ This approach ensures balanced results in various lighting conditions, offering reliability for photographers of all skill levels․
Adjusting Exposure Compensation
Exposure compensation on the Canon AE-1 Program allows photographers to fine-tune exposures by ±2 stops in 1/3-stop increments․ This feature is useful for correcting meter readings in challenging lighting conditions, such as backlit subjects or high-contrast scenes․ To adjust, use the exposure compensation dial located near the lens mount․ This ensures your images are properly exposed, preventing overly bright or dark areas․ It’s a handy tool for achieving more accurate and creative results in various shooting situations․

ISO Settings and Bracketing
The Canon AE-1 Program supports ISO settings from 12 to 3200, enabling photographers to adapt to various lighting conditions․ Bracketing allows capturing multiple exposures of the same scene at different settings to ensure optimal results, especially in challenging lighting scenarios․
Understanding ISO and Its Impact on Photography
ISO (International Organization for Standardization) refers to the sensitivity of film or a digital sensor․ The Canon AE-1 Program supports ISO settings from 12 to 3200, allowing photographers to adjust sensitivity based on lighting conditions․ Lower ISOs (e․g․, 100-400) are ideal for bright light, producing sharp images with minimal grain․ Higher ISOs (e․g․, 1600-3200) enable shooting in low light but may introduce grain, affecting image quality․ Balancing ISO is crucial for achieving desired results in various photographic scenarios․
Bracketing Shots for Optimal Exposure
Bracketing involves capturing multiple shots of the same scene at different exposures to ensure optimal lighting․ The Canon AE-1 Program allows manual bracketing by adjusting aperture or shutter speed between shots․ This technique is especially useful in high-contrast situations, where a single exposure may not capture all details․ By bracketing, photographers can later select the best exposure or combine shots for a balanced result, ensuring no overexposed highlights or underexposed shadows․
Depth of Field and Aperture Control
Depth of field controls the focus area in an image, from sharp foregrounds to blurred backgrounds․ Aperture size directly influences this, with smaller f-stops increasing depth of field for sharper backgrounds and larger f-stops reducing it for creative blur effects․ The Canon AE-1 Program allows precise aperture adjustments to achieve desired focus effects, enhancing compositional flexibility in various photographic scenarios․
Understanding Depth of Field
Depth of field refers to the area in an image that appears sharply focused, from foreground to background․ A smaller aperture (higher f-stop) increases depth of field, keeping more of the image in focus, while a larger aperture (lower f-stop) reduces it, blurring the background․ The Canon AE-1 Program allows you to control this creatively, enabling precise adjustments to isolate subjects or capture detailed landscapes with ease and flexibility․
Controlling Aperture for Desired Effects
Aperture regulates the amount of light entering the lens and directly influences depth of field․ On the Canon AE-1 Program, you can adjust the aperture using the aperture ring or through aperture-priority mode․ A lower f-stop (e․g․, f/2․8) creates a shallow depth of field, ideal for portraits, while a higher f-stop (e․g․, f/16) sharpens the entire image, perfect for landscapes․ This control allows photographers to achieve their desired artistic effects effortlessly․

Shutter Speed and Camera Shake
Shutter speed affects motion capture and camera stability․ Slower speeds increase blur risk, while faster speeds freeze action․ Use a tripod or faster speeds to minimize shake․
Understanding Shutter Speed and Its Effects
Shutter speed controls the duration light enters the camera, impacting motion and blur․ The Canon AE-1 Program offers speeds from 1/1000th of a second to 30 seconds․ Faster speeds freeze action, while slower speeds create artistic blur․ A midpoint like 1/125th second balances sharpness and natural motion․ Understanding shutter speed is crucial for capturing dynamic or creative effects in various lighting conditions, making it a foundational skill in film photography․
Preventing Camera Shake
To avoid camera shake, use a tripod for stability, especially in low light․ Set the self-timer or use a remote release to minimize hand movement․ Choose faster shutter speeds (1/60th second or faster) when hand-holding․ Tuck your elbows in and hold the camera firmly․ These techniques ensure sharper images, even in challenging conditions, while maintaining creative control over your photography with the Canon AE-1 Program․
Using Flash and External Lighting
The Canon AE-1 Program supports external flash units and continuous lighting for enhanced illumination․ Use the hot shoe or PC terminal for syncing flashes, ensuring balanced exposures in various lighting conditions․
Built-In Flash and External Flash Options
The Canon AE-1 Program does not have a built-in flash but supports external flash units via its hot shoe and PC terminal․ External flashes provide greater flexibility and power, enabling better illumination in low-light conditions․ Users can attach compatible flash units to the hot shoe for automatic or manual flash control․ The PC terminal allows synchronization with studio strobes or other external lighting systems, offering precise control for professional results․
Tips for Effective Flash Photography
For effective flash photography with the Canon AE-1 Program, ensure the flash is properly synchronized and adjusted to match your subject’s distance․ Use bounce flash techniques to soften harsh light and reduce shadows․ Diffuse the flash with a softbox or diffuser for natural results․ Meter the scene to balance flash and ambient light․ Avoid overexposure by adjusting flash intensity or using neutral density filters․ Test shots and review results to refine your technique for optimal flash photography outcomes․
Troubleshooting Common Issues
Check film counter for proper loading, ensure battery power, and inspect shutter curtains for obstructions․ Address blurry photos by avoiding camera shake and ensuring accurate focus․
Resolving Exposure Errors
Exposure errors can occur due to incorrect settings or lighting conditions․ Check the exposure compensation dial and ensure it’s set to zero or adjust as needed․ In Program Mode, verify that aperture and shutter speeds align with the scene․ For Aperture Priority, adjust the aperture or ISO․ In Shutter-Speed Priority, modify the shutter speed or ISO․ In Manual Mode, tweak aperture and shutter speed for accurate exposure․ Bracketing shots can help capture optimal exposures․
Dealing with Camera Malfunctions
If the Canon AE-1 Program malfunctions, first check the battery and ensure it’s functioning․ Clean the battery contacts with a soft cloth․ If the shutter doesn’t fire, ensure the film advance lever is fully reset․ For metering issues, verify the lens is properly mounted and the aperture ring is set correctly․ Lubricate moving parts sparingly if stuck․ Replace worn light seals to prevent leaks․ Refer to the manual or consult a professional for complex repairs․
Maintenance and Repair
Regularly clean the camera with a soft cloth and brush to remove dust․ Use isopropyl alcohol for stubborn stains․ Lubricate moving parts sparingly․ Replace worn light seals carefully to maintain functionality and prevent light leaks․ Store the camera in a dry place to avoid moisture damage․ Use silica gel packets to absorb humidity, ensuring optimal performance and longevity․
Cleaning and Maintaining the Camera
Use a soft, dry cloth to wipe the camera body and external surfaces․ For stubborn marks, lightly dampen the cloth with water but avoid harsh chemicals․ Clean the mirror and viewfinder with a microfiber cloth and isopropyl alcohol․ Regularly inspect and clean the lens to prevent dust buildup․ Store the camera in a dry, cool environment to prevent humidity damage․ Avoid touching the lens or internal components to maintain functionality and image quality․
Basic Repair Tips and Resources
For minor repairs, consult the Canon AE-1 Program manual or online forums for guidance․ Common issues like stuck mirrors or faulty shutters can often be resolved with basic tools․ Use a screwdriver set designed for cameras to avoid damage․ For complex repairs, seek a professional technician․ Resources like repair manuals, YouTube tutorials, and photography communities can provide valuable insights․ Always ensure replacement parts are compatible with your camera model for optimal performance․
The Canon AE-1 Program remains a timeless choice for photographers, blending ease of use with creative control, making it a cherished tool in film photography․
Final Thoughts on the Canon AE-1 Program
The Canon AE-1 Program is a timeless camera that combines simplicity with advanced features, making it a favorite among film enthusiasts․ Its durability, intuitive design, and compatibility with a wide range of lenses ensure it remains relevant․ Whether for casual shooting or professional use, the AE-1 Program delivers exceptional results, cementing its legacy as a cornerstone of film photography․ Its active community and abundant resources make it a rewarding choice for photographers of all levels․
Resources for Further Learning
For deeper understanding, explore official Canon resources, online forums, and photography communities․ Websites like Canon’s official site, Flickr groups, and Reddit’s film photography forums offer valuable insights․ Photography workshops and YouTube tutorials provide hands-on learning․ Books on film photography, such asCanon AE-1 Program manuals, and eBooks from photography experts can enhance your skills․ These resources will help you master the AE-1 Program and film photography techniques effectively․